
About
This project was made in my first year at BUAS. We had to make a ray tracer. With different kinds of materials and post processing effects. With this I made a chess match.
Creation I Made
I made a ray tracer with different materials: texture, metalic and glass, different effects: vignette, chromatic abberation, depth of field, bloom and more and having different types of lights: pointlight, arealight, etc.
Ray tracing
With the ray tracing, rays are being shot from the camera to every pixel on the screen. By looping through each pixel on the screen, I call the Trace function, the rays then calculated different things, the skybox, the materials and lights.
float3 Renderer::Trace(Ray& ray, int depth, int _x, int _y, int _frame)
{
	if (depth == bounchReflections)
		return 0.0f;

	scene.FindNearest(ray);

	//Hdri skybox reference: https://jacco.ompf2.com/2022/05/27/how-to-build-a-bvh-part-8-whitted-style/
	if (ray.objIdx == -1)
	{
		float phi = atan2(ray.D.z, ray.D.x);
		uint u = static_cast(skyWidth * (phi > 0 ? phi : (phi + 2 * PI)) * INV2PI - 0.5f);
		uint v = static_cast(skyHeight * acosf(ray.D.y) * INVPI - 0.5f);
		uint skyIdx = (u + v * skyWidth) % (skyWidth * skyHeight);
		skyIdx *= 3;
		return 0.65f * float3(skyData[skyIdx], skyData[skyIdx + 1], skyData[skyIdx + 2]);
	}
	float3 I = ray.IntersectionPoint();

	Mesh& mesh = scene.GetMesh(ray.objIdx);
	float3 albedo = mesh.GetAlbedo(I, ray);
    ..//Getting the material values of each material type

	float3 light = float3(0.0f);

	for (const LightData& data : lightDatas)
	{
		switch (data.type)
		{
		case 0://Directional
			light += directionLight->CalculateDirectionalLight(data, N, I, scene, ray.D, mesh.vertices, mesh.normals, ray.bvhHit);
			break;
		..//Calculations of other light types
		}
	}

	if (refractive != 0.0f)
		return CalculateDielectric(ray, I, N, albedo, refractive, depth, _x, _y, _frame);
	if (reflective != 0.0f)
		return CalculateReflective(ray, I, N, albedo, light, reflective, 0.0f, depth, _x, _y, _frame);

	float3 emLight = emColor * emStrenght;
	if (emStrenght > 0.0f && reflective == 0.0f && refractive == 0.0f)
		return lerp(albedo, emLight, emStrenght);
	else
		return albedo * light;

	return float3(0.0f);
}
Lights
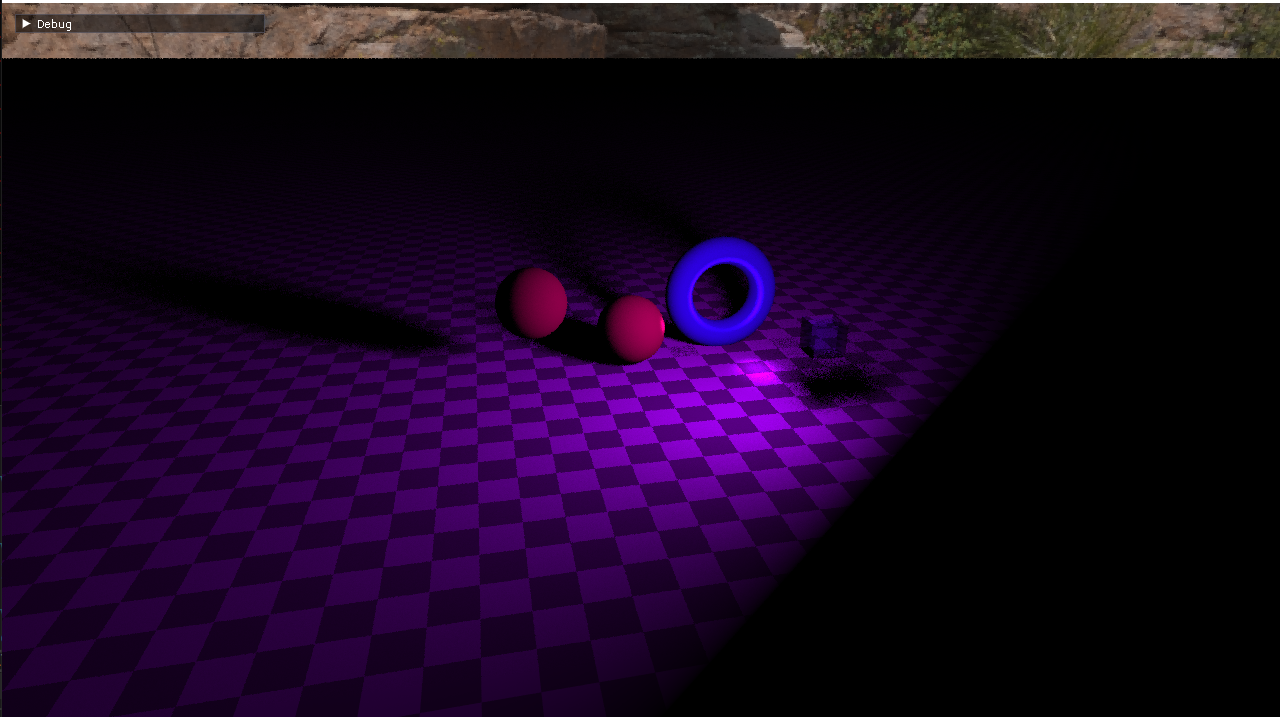
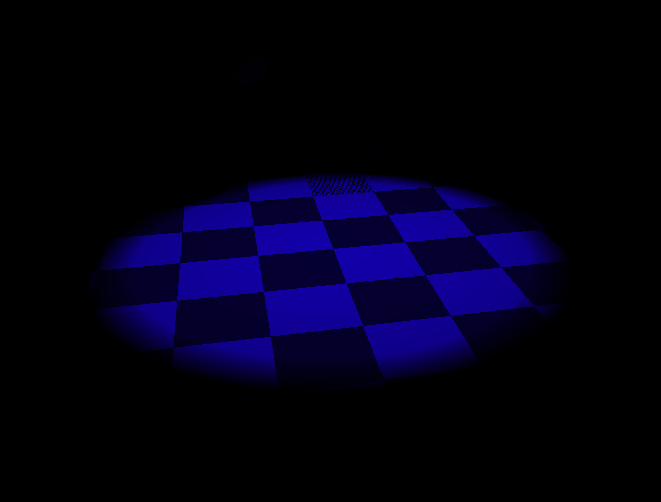
For in the Trace function a caluclate different lights. A example in the code snippet is the calculation for a point light. A direction is first calculated, then to solve a issue with the shadows I am applying a shadow terminator. I am doing this because, when shadows were being cast on object on some parts of the mesh the whole triangle was covered with shadow. With the terminator, that resolves the issues and makes it a nice smooth shadow on the mesh. After that a new ray is shot for the shadows, a attenuation for light fallof, the diffuse of the light and after that a specular effect.
float3 PointLight::CalculatePointLight(const LightData& _lightData, float3 _normal, float3 _objectPosition, Scene& _scene, float3 _rayDir, std::vector& _vertices, std::vector& _normals, tinybvh::Intersection _bvhHit)//add indicator visual to see where light is
{
	float3 lightDirection = _lightData.position - _objectPosition;
	float lightDistance = length(lightDirection);
	lightDirection /= lightDistance;//Normalizing

	float cosa = dot(_normal, lightDirection);
	if (cosa <= 0.0f)
		return 0.0f;

	//Shadow terminator : https://jo.dreggn.org/home/2021_terminator.pdf
	int primIdx = _bvhHit.prim * 3;
	float3 a = _vertices[primIdx];
	float3 b = _vertices[primIdx + 1];
	float3 c = _vertices[primIdx + 2];

	float3 na = _normals[primIdx];
	float3 nb = _normals[primIdx + 1];
	float3 nc = _normals[primIdx + 2];

    //Calculate distance vectors from triangle vertices
	float3 tmpu = _objectPosition - a;
	float3 tmpv = _objectPosition - b;
	float3 tmpw = _objectPosition - c;

	float dotU = min(0.0f, dot(tmpu, na));
	float dotV = min(0.0f, dot(tmpv, nb));
	float dotW = min(0.0f, dot(tmpw, nc));

	tmpu -= dotU * na;
	tmpv -= dotV * nb;
	tmpw -= dotW * nc;

	float w = 1.0f - _bvhHit.u - _bvhHit.v;

	float3 pp = _objectPosition + _bvhHit.u * tmpu + _bvhHit.v * tmpv + w * tmpw;

	Ray shadowRay = Ray(pp + lightDirection * OFFSET, lightDirection, lightDistance - 2 * OFFSET);

	if (_scene.IsOccluded(shadowRay))
		return 0.0f;

	float attenuation = 1.0f / (constant + linear * lightDistance + quadratic * (lightDistance * lightDistance));

	float diff = fmaxf(dot(_normal, lightDirection), 0.0f);

	//Diffuse
	float3 diffuse = diff * _lightData.intensity * _lightData.color;
	diffuse *= attenuation;

	//Specular
	float shinyness = 10.0f;
	float specularstenght = 2.0f;
	float3 viewDir = normalize(_rayDir - _objectPosition);
	float3 reflectDir = reflect(-lightDirection, _normal);
	float spec = powf(max(dot(viewDir, reflectDir), 0.0f), shinyness);
	float3 specular = spec * specularstenght * _lightData.color;

	return diffuse + specular;
}
Post processing
With the code block below, post processing is applied. First the original screen is copied to a texture. Then the color grading shader is applied (brightness, contrast, saturation, gamma correction), rendering the result to a second framebuffer. Second, the color graded result is used as input for the screen effect shader (vignette, chromaticAberration, bloom), which renders the output directly to the screen.
void Renderer::ApplyPostProcessing()
{
	glBindFramebuffer(GL_FRAMEBUFFER, fbo1);
	glClear(GL_COLOR_BUFFER_BIT | GL_DEPTH_BUFFER_BIT);
	screenTexture1->CopyFrom(screen);
	glBindFramebuffer(GL_FRAMEBUFFER, 0);

	//Color
	glBindFramebuffer(GL_FRAMEBUFFER, fbo2);
	glClear(GL_COLOR_BUFFER_BIT);

	shaderColor->Bind();
	shaderColor->SetInputTexture(0, "screenTexture", screenTexture1);
	shaderColor->SetBool("isGammaCorrect", gammaCorrect);
	shaderColor->SetBool("isColorGrading", colorGrading);
	shaderColor->SetFloat("brightness", brightness);
	shaderColor->SetFloat("contrast", contrast);
	shaderColor->SetFloat("saturation", saturation);

	DrawQuad();

	shaderColor->Unbind();
	glBindFramebuffer(GL_FRAMEBUFFER, 0);

	//Effects
	glClear(GL_COLOR_BUFFER_BIT);

	shaderEffect->Bind();
	shaderEffect->SetInputTexture(0, "screenTexture", screenTexture2);

	shaderEffect->SetBool("isVignette", vignette);
	shaderEffect->SetFloat("vignetteRadius", vignetteRadius);
	shaderEffect->SetFloat("vignetteCutoff", vignetteCutoff);

	shaderEffect->SetBool("isChromaticAberration", scene.chromaticAberration);
	shaderEffect->SetFloat("caOffsetR", scene.caOffsetR);
	shaderEffect->SetFloat("caOffsetG", scene.caOffsetG);
	shaderEffect->SetFloat("caOffsetB", scene.caOffsetB);
	shaderEffect->SetVec2("caDirection", scene.caDirection.x, scene.caDirection.y);

	shaderEffect->SetBool("isBloom", bloom);
	shaderEffect->SetFloat("bloomIntensity", bloomIntensity);

	DrawQuad();
	shaderEffect->Unbind();
}
Shaders
In the shaders is where the magic happens. There are 2 shaders: one to adjust colours and the other one for screen effects.
The first code block shows how I am calculating different screen effects: Bloom, chromaticAberration, and Vignette.
Bloom is a simple calculation by multiplying a colour with an intensity and adding that to the colour output.
For chromaticAberration, each RGB value uses the texture together with the UVs and an offset. The separate RGB channels
of the texture are then blended with the original colour at 50% strength and applied to the colour output.
For Vignette, the UVs are remapped to the center the coordinate system. Using smoothstep between the vignette radius and
cutoff value, a gradient is created that darkens the edges of the screen.
This value is then multiplied to the colour output.
How you apply each effect is also important. If you, for example, first calculate Vignette and then bloom and CA,
the vignette effect wouldn't properly be shown on screen.
The second code block changes the colour the person sees. First the shader extracts the bright areas of the image to
create a bloom texture that is being used for a blur pass. This is done by calculating a brightness value using the dot product
of the colour and weighted colour values. If then the brightness is greater than 0.95, it outputs the colour to BrightColor,
otherwise the colour is set to black. For colour grading, there is brightness, which is a simple calculation
of multiplying a value with the colour. For contrast, you subtract a small value from the colour, multiply it with the contrast value,
and add the small value back again. For saturation, you get a gray value using a dot product of the colour and a
specified value, then you mix the gray value and the colour with the saturation value and apply it to the colour output.
Together these calculations form color grading. The last effect is gamma correction, which is a simple square root of the colour.
//Screen
void main()
{
	vec2 uv = vec2(fragUV.x, fragUV.y);
	vec4 color = texture(screenTexture, uv);
	vec4 bloomColor = texture(bloomTexture, uv);

	//Bloom
	if(isBloom)
		color += bloomColor * bloomIntensity;

	//Chromatic aberration	//Reference: https://www.youtube.com/watch?v=3CsNRBme6nU
	if(isChromaticAberration)
	{
            vec3 aberration;
	    aberration.r = texture(screenTexture, uv + caDirection * caOffsetR).r;
            aberration.g = texture(screenTexture, uv + caDirection * caOffsetG).g;
            aberration.b = texture(screenTexture, uv + caDirection * caOffsetB).b;

	    color.rgb = mix(color.rgb, aberration, 0.5);
	}

	//Vignette	//References: https://www.youtube.com/watch?v=RnwPPHGMowI: https://www.shadertoy.com/view/lsKSWR
	if(isVignette)
	{
		vec2 uv2 = uv * 2.0 - 1.0;
		float vig = smoothstep(vignetteRadius, vignetteCutoff, length(uv2));
		color.rgb *= vig;
	}

	FragColor = color;
}
//Colors
void main()
{
	vec2 uv = vec2(fragUV.x, 1.0 - fragUV.y);
	vec4 color = texture(screenTexture, uv);

	//Setting bright parts of color into own vec4
	float brightnessBloom = dot(color.xyz, vec3(0.2126, 0.7152, 0.0722));
	if(brightnessBloom > 0.95)
		BrightColor = color;
	else
		BrightColor = vec4(0.0, 0.0, 0.0, 1.0);

	//Color grading
	//Brightness, contrast, saturation
	if(isColorGrading)
	{
		color.rgb *= brightness;

		color.rgb = (color.rgb - 0.5) * contrast + 0.5;

		float gray = dot(color.rgb, vec3(0.299, 0.587, 0.114));
		color.rgb = mix(vec3(gray), color.rgb, saturation);
	}

	//Gamma correction
	if (isGammaCorrect)
	{
		color.x = sqrt(color.x);
		color.y = sqrt(color.y);
		color.z = sqrt(color.z);
	}

	FragColor = color;
}
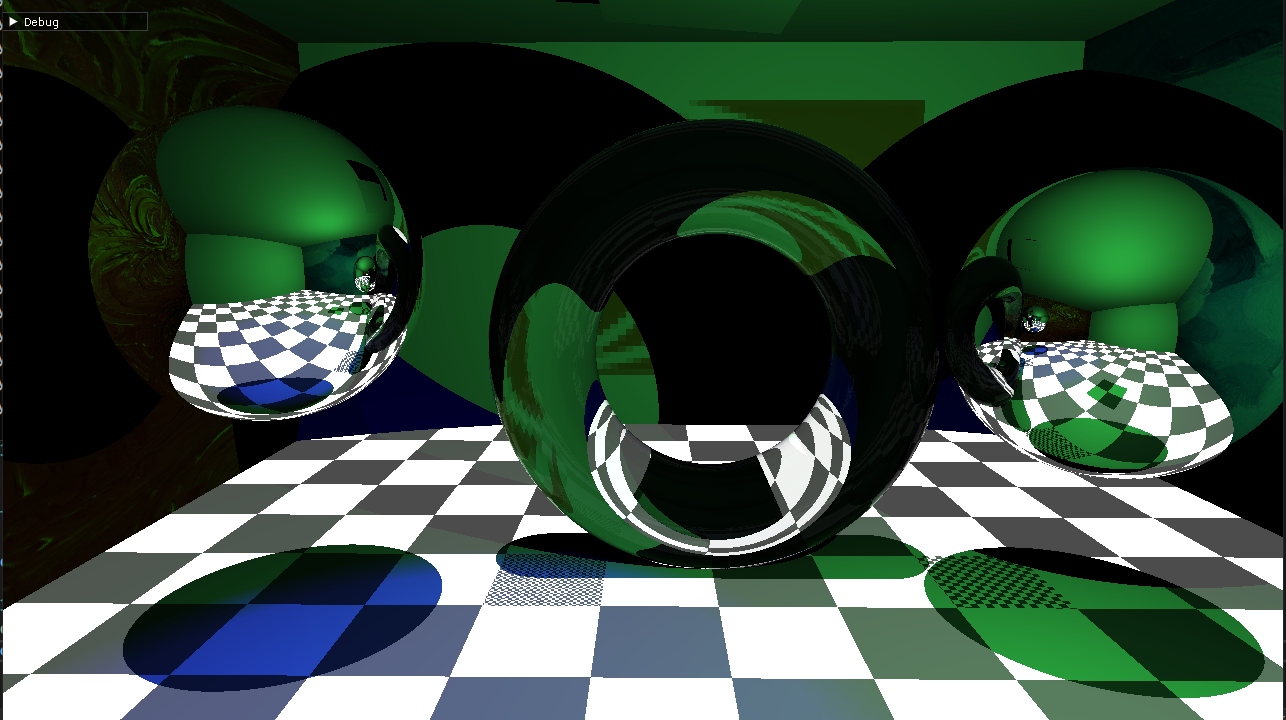
Materials
Within the Trace function, the values of each material type are calculated. This is then used to calculate the different material types: transparent, reflective, emissive, and colour. The code block below shows an example of one of the functions to calculate such a value. This one is to get the albedo value from the texture. For this, I am using mipmaps for each texture; these are precalculated at the creation of a mesh. I loop through each mipmap level, getting its distance threshold for the current and next mipmap level, then a check to see if the distance(distance from camera to the surface) is less than or equal to the next mipmap levels threshold. If so, then it does a trilinear interpolation between the current and next mipmap levels based on how close the distance is to the threshold. This makes the texture smoothly change between mipmap levels. For the last mipmap level, both thresholds are set to the same value to prefend indexing out of bounds.
float3 Material::GetAlbedo(float _distance, float _u, float _v) const
{
	if (texture != nullptr)
	{
		//Smooth lerping between mipmaplevels
		for (int i = 0; i < texture->GetMaxMipMapLevels(); i++)
		{
			float mipMapLevelDistance = 0.0f;
			float prefMipMapLevelDistance = 0.0f;
			if (i == texture->GetMaxMipMapLevels() - 1)
			{
				mipMapLevelDistance = texture->GetMipMapDistance(i);
				prefMipMapLevelDistance = texture->GetMipMapDistance(i);
			}
			else
			{
				mipMapLevelDistance = texture->GetMipMapDistance(i + 1);
				prefMipMapLevelDistance = texture->GetMipMapDistance(i);
			}

			if (_distance <= mipMapLevelDistance)
				return texture->TrilinearInterpolation(_u, _v, i, mipMapLevelDistance, prefMipMapLevelDistance, _distance);
		}
	}

	return albedo;
}
My Thoughts
I liked how this project went, I learned a lot about ray tracing, how different materials are caluclated, how you could apply post processing effects, different types of lights but also the techniques behind it, how you could optimize it, how to make it faster, and much more. What I didnt like very much was the performance it wasnt that good of a perforance on a big window, so maybe later in time I would retry to make a ray tracing scene and see if I can make it for a full width and height of the screen.